LINUX EMBEDDED SYSTEMS
 DIENSTLEISTUNGEN
 LÖSUNGEN
RTOS Systeme› Elektronik Design› Geräte steuern per
Web / Smartphone
 PRODUKTE
 BOARD SUPPORT
PACKAGES
Intel 8080 emulator: CP/M on an ARM microcontroller
This demo project is the result of a hobby project and shows how easy it is
to even run a famos operating system on our eNet-sam7X boards. It is not
intended to be a very usefull application but shall give the curious a nice
and geek platform to play with for further experiments.
In fact usage of the project is not limited to our eNet-sam7X board but is
a general Nut/OS application and can be used on any Nut/OS platform that provides
the necessary requirements (>=128K RAM, MMC slot, etc...). We've tested this
software on the Ethernut3 board as well.
This CP/M emulator is easy portable and will run on several other platforms like
ARM, Cortex M3, AVR32, etc.
About the project
This code is based on a sligtly modified version of Óscar Toledos obfuscated
Intel 8080 emulator. 19th IOCCC. Best of Show.
The 8080.c code is (c) by Óscar Toledo Gutiérrez and was released to the
public domain!
See: http://nanochess.110mb.com/emulator.html
Many thanks go to Óscar Toledo Gutiérrez for this amazing piece of code!
Most of this explanation is taken from his website with his permission.
Btw: Please do not ask question about how the 8080.c code works. I have not
understood it either :) You'll find some little information about the
internals on Óscar Toledo Gutiérrez website.
CP/M on your eNet-sam7X or Ethernut board
Have you ever tried to run a nearly 30 year old CP/M operating system on your
ARM or AVR32 microcontroller board? Here you go!
This program emulates a complete Intel® 8080 processor, along with a teletype
and a disk controller, just like at the start of the personal computers
revolution (around 1975).
The 8080 CPU was the second CPU which was designed by Intel and is known to be
the first real microprocessor. It is the predecessor of the famos Z80 and it's
design also had major influence to the well known x86 CPU family.
The following chapter refer to the software from time to time, so I suggest to
download and unpack the software before you continue with this explanation.
How to use it
As just mentioned above, this code emulates as CPU and a whole computer system.
As any other computer to, it needs some firmware to do something usefull.
So we need a mass storage device that supports read / write access. I decided
to use the PHAT file system on an SD/MMC card.
The programm will try to load some disk images and firmware files from the
SD/MMC cards root folder.
The following files are needed:
| c_basic.bin and c_bios.bin | That's the firmware (bios or basic) |
| A | Disk image for drive A |
| B | Disk image for drive B |
In the folder "firmware" you'll find two files:
| c_bios.bin | Special computer BIOS designed for this emulator |
| c_basic.bin | Public domain Palo Alto Tiny BASIC (by Li-Chen Wang), published on the very first volume of the now extinct Dr. Dobb's Journal magazine. |
c_bios.bin will be needed if you want to run CP/M for example, c_basic.bin can
be used stand-alone.
Copy both of them into your SD/MMC cards root folder and insert it into your
board.
Any user input / output will be done through stdio, so UART0 in this case.
Your serial terminal programm (Hyper terminal / minicom / ...) will act as
VT100 terminal connected to your 8080 Computer :)
To continue playing with the emulator first flash the 8080-emulator.bin file to
your board.
For the eNet-sam7X and ethernut3 boards we also provide pre-compiled binary:
- 8080-emulator-eNet-sam7X.bin
- 8080-emulator-ethernut3.bin
Let's start playing with BASIC
As mentioned above just copy c_basic.bin to your SD/MMC cards root folder.
Insert your card into your Ethernut or eNet-sam7X board and reset the board.
You will see the following screen on your serial terminal program:
Registering MMC...
Registering PHAT: OK
Registering MMC0: OK
Mounting partition:
Mounting partition: success
Startup options. Please select 1, 2 or 3
1 -- Start emulator (run BASIC interpreter bios)
2 -- Start emulator (run CP/M bios)
3 -- Select file to import to CP/M disk image, then start emulator (CP/M bios)
Please select '1' here...
Et voila! You get the public domain Palo Alto Tiny BASIC (by Li-Chen Wang), published on the very first volume of the now extinct Dr. Dobb's Journal magazine. It will show the following prompt:
>
If you wan't to exit the BASIC interpreter press "
First program:
Please use upper case letters and press
20 PRINT "You are running BASIC on your Nut/OS board..."
30 FOR A=1 TO 10
40 PRINT A
50 NEXT A
LIST
RUN
The RUN command will start your program and produces the following output:
You are running BASIC on your Nut/OS board...
1
2
3
4
5
6
7
8
9
10
OK
>
When the program is finished it will return the the BASIC command prompt again and you can modify and re-run your program if you like.
Tired of BASIC? Let's run CP/M
You can download everything you need for a true CP/M system fromhttp://www.retroarchive.org
See the details below for the first steps...
The following files are not included in this software package because of copyright issues etc. So please download
http://www.retroarchive.org/cpm/os/KAYPROII.ZIP
and extract CPM64.COM from the SOURCE directory, and copy it to files named A and B on the SD/MMC cards root folder. These files will later be used as disk-drives.
Now make sure you also have copied the c_bios.bin file from the firmware directory to the SD/MMC card as well. Insert the card into your board and restart the board.
Again you'll see the startup messages and menu. This time select option '2' "2 -- Start emulator (run CP/M bios)".
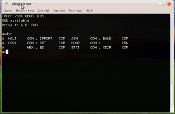
Watch your serial terminal program! You'll see a running CP/M operating system!
59K available
Drive A: & B: 8MB
A>
A>dir
A: HALT COM : IMPORT COM
A>
There are just two programs installed on drive A:
| HALT.COM | Stop the emulator and close disk drives |
| IMPORT.COM | Import new files to the current disk image |
For a complete CP/M system, you'll need further files from the KAYPROII.ZIP, SOURCE directory:
- ASM.COM
- DDT.COM
- DUMP.COM
- ED.COM
- LOAD.COM
- PIP.COM
- STAT.COM
- SUBMIT.COM
- XSUB.COM
A list of the available files (on the SD/MMC card) will be shown.
Please enter the filename you want to import to the CP/M disk image at the "Import? > :" prompt.
When the A> prompt appears, enter:
When you'r back on the A> call "HALT" to shut-down the system.
So the file is saved and you can start over again and repeat the same process with another file again. It is very important to always directly call "HALT" after "IMPORT" in the CP/M environment to make sure the file is correctly saved to the disk image.
So you will have to do the following steps for a full CP/M system:
- Start the board
- Select option '3'
- Import? > ASM.COM
- (at the CP/M system) IMPORT ASM.COM
- (at the CP/M system) HALT
- Say 'y' at the "Emulator halted, restart? [Y/N]" prompt.
- Import? > DDT.COM
- (at the CP/M system) IMPORT DDT.COM
- (at the CP/M system) HALT
- Say 'y' at the "Emulator halted, restart? [Y/N]" prompt.
- Repeat the above steps for
- DUMP.COM
- ED.COM
- LOAD.COM
- PIP.COM
- STAT.COM
- SUBMIT.COM
- XSUB.COM
- repeat the above steps for any further files you would like to import
Why that complicated? Is there no easier way to import files?
Indeed importing files to the CP/M disk-image is not implemented very efficiently. Unfortunately the source-code of the 8080 emulator core was intentionaly written for unix systems and was not realy intended to be used on an embedded system. Further it is higly obfuscated to modifing it to our own needs is not that easy...
Importing a file is mostly implemented in the 8080 Bios code, which unfortunately is not available in source. The original emulator itself just had the option to pass one filename as argument, and so we do when calling the run_8080() function.
The emulator code reads the given file and passes it's contents to the IMPORT command, running in the 8080 Code space (as BIOS extension).
There might be better ways to create a disk image.
For example the cpmtools are able to create read and write CP/M disk images.
For further informations look at:
http://www.moria.de/~michael/cpmtools/
http://www.cpm8680.com/cpmtools/
On most linux systems the cpmtools are directly installable from the software repositories.
Having ever done Text processing on your eNet-sam7X or Ethernut board?
Beside of simple CP/M tools you can also try to run a full-featured text processor. The WS33-KPR directory of the KAYPROII.ZIP file also contains a Wordstar version that works with this emulator.Further interesting things are e.g.:
A classical adventure game by Crowther and Woods in the ADVENTUR directory,
For further Ideas on how the code works and what software you might want to try take a look at the Toledo 8080 CP/M emulator homepage:
http://nanochess.110mb.com/emulator.html
There you'll also find some internals how the emulator works.
Some words about CP/M usage
Just remember the good old MS-DOS and you will be familiar with CP/M too. The CP/M user's manuals are available on www.retroarchive.org.Here is a little reference of the command line:
Internal commands:
| A: | Change current drive to A |
| B: | Change current drive to B |
| DIR | List files in drive |
| DIR *.TXT | List all files with TXT extension |
| TYPE FILE.TXT | Shows content of FILE.TXT |
| ERA FILE.TXT | Erases file FILE.TXT |
| USER 1 | Change to user 1 (0-15 available) It behaves somewhat like subdirectories. So you can separate your files. |
External commands:
| STAT | Show used/free space on drive |
| STAT *.* | Show file sizes. |
| DDT PROG.COM | List files in drive |
| DIR *.TXT | Debug PROG.COM. To quit use Ctrl+C Dump address 0100 (hex): D0100 |
System requirements
The emulator code assumes some basic requirements:- More than 64K of free RAM (as the emulated ram of the 8080 CPU itself is 64K large)
- A 32 bit CPU (better: integer size of 32 Bit)
- A Filesystem wich supports reading and writing to store the disk-images
I tested it on:
- eNet-sam7X
- Ethernut3
But it should also work with little modifications on Ethernut5, EIR, AVR32 platform, etc...
Compilation
Just compile this program like any other Nut/OS program and install it on your Ethernut or eNet-sam7X board.The 8080 emulator code itself is heavily obfuscated C code and uses lots of nasty C-tricks.
It won't compile without lots of warnings, so I needed to add the -w option to the CFLAGS to suppress all warnings!
What have been done to port the code to Nut/OS?
8080.c:- Calls to system() were removed
- Prepended filesystem (PHAT0:) to the filenames (see fopen calls)
- renamed the main() function to run_8080()
- Give the bios filename to the run_8080() function
- Check if a key was pressed by reading _filelength(_fileno(stdin))
- Open stdin / stdout in raw-mode
- use _write(_fileno(stdout)) to write out a character to the console
- reformatted the lines to get a nice layout again.
8080-emulator.c:
That's the Nut/OS wrapper... First the UART (as console) and the MMC driver will be initialised. That you will be prompted to give an import filename (used in conjunction with the IMPORT command on CP/M).
Next the emulator is started. If the emulator exists (HALT command on CP/M) the code restarts with the import promt, which allows you to import several files to a disk image one after the other...
Some Links and ressources
Downloads


